Click the Boundary button,![]() , in the Chart toolbar.
, in the Chart toolbar.
In the Boundaries Properties dialog box, enter a name for the new boundary or accept the default name.
Use the boundary tool to create your own airspace avoidance areas.
To create a new boundary:
Click the Boundary button,![]() , in the Chart toolbar.
, in the Chart toolbar.
In the Boundaries Properties dialog box, enter a name for the new boundary or accept the default name.
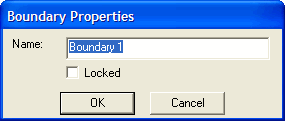
Select the Locked check box to protect the boundary against inadvertent modifications.
Click OK.
While the boundary cursor is active,![]() , click on the Enroute Charts View to delineate the new boundary.
, click on the Enroute Charts View to delineate the new boundary.
When you are finished, click the Boundary button in the Chart toolbar again or right-click in the enroute chart and choose Finish Boundary.
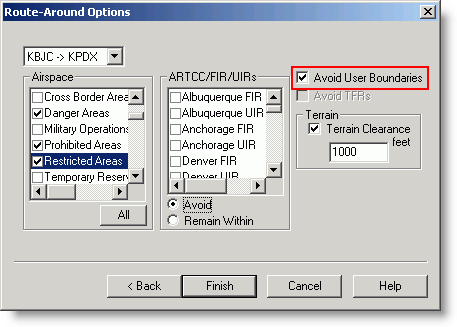
In the Route-Around Options dialog box of the RoutePack or Route Wizard, select the Avoid User Boundaries check box.
To add to an existing boundary:
Right-click the boundary in the enroute chart and choose Append to Boundary from the shortcut menu.
Add the desired points.
To rename the boundary:
Right-click the boundary in the enroute chart and choose Properties from the shortcut menu.
Rename the boundary and click OK.
To unlock the boundary:
Right-click the boundary in the enroute chart and choose Properties from the shortcut menu.
Clear the Locked check box.
Use one of the following methods to delete a boundary:
Right-click the boundary on the enroute chart and choose Delete from the shortcut menu.
Select the boundary on the enroute chart and press the DELETE key.
Select the boundary on the enroute chart, and then click File > Delete.