Jeppesen Weather Service live weather overlays in the Enroute Charts view are derived from the static graphic maps downloaded via the Weather Controller.
The weather graphics described below are larger than text files and generally take longer to download. This difference in file size matters more as connection speed diminishes, especially for modems.
This topic reviews this following information:
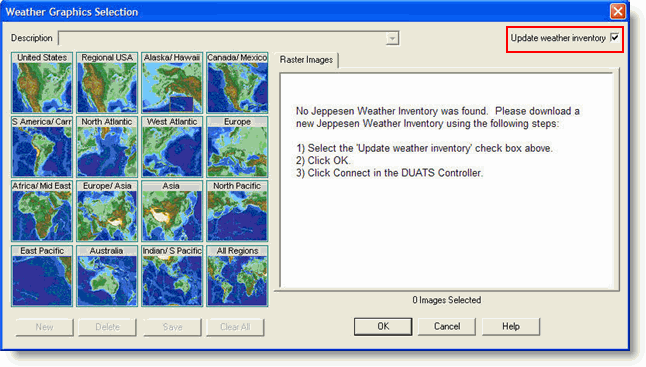
When you initially go to the Weather Graphics Selection dialog box to select the weather products to download, it might be empty. To update the Jeppesen weather products list:
Click the Weather tab or click View > DUATS Controller.
Select Jeppesen Wx:Internet from the Weather Provider drop-down menu.
In the Weather Selection:Weather Type section, select Jeppesen Weather Images.
Click Add.
In the Weather Graphics Selection dialog box, select the Update weather inventory check box.

Click OK.
Click Connect. See Connecting to Jeppesen Weather for additional information.
After the initial inventory download, the weather inventory is automatically updated with every image download. The only time you need to select the Update weather inventory check box is if you want to force the inventory to update without picking any images for download.
Use the following procedure to create a new weather request:
Open the Weather Graphics Selection dialog box.
When you initially bring up the dialog and an inventory exists, the Description field automatically defaults with the name New Graphic. To save your weather request for use in the future, highlight New Graphic in the Description field, and enter a name.

Select the desired region image on the left. A red border dsignates the currently selected region.
In the Raster Images tab, select the weather graphics you want to download. Expand the lists by clicking on the plus sign (+) for that weather map type. Further expand the list for a specific weather map using the plus sign (+) next to the weather map name.
| NOTE | Select the check box to the left of the weather map type if you only want the most recent weather graphic of a specific type in a location. If you want to see the older weather graphics for trend analysis, expand the weather map type selection. Select the oldest graphic you want to download. Everything above it, that is, more recent, is selected automatically. |
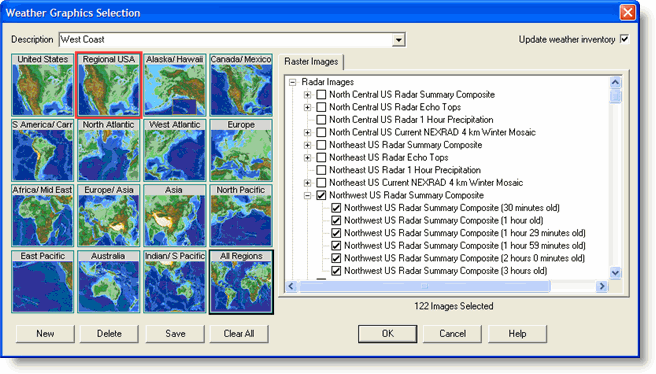
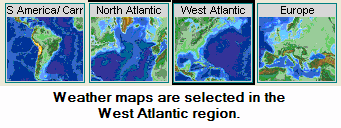
Continue selecting the weather maps for this request. You can select maps in any region. A thick, dark border appears around the region image when it contains selected weather maps.
(Optional) To save this request for future use, click Save.
In the Weather Graphics Selection dialog box, click OK.
In the Script Commands section of the DUATS Controller, the Jeppesen Weather Images are added with the given name used for the description. There is a one-to-one association with the Script Commands listed in the DUATS Controller to that listed in the Description field of the Weather Graphics Selection dialog box. If you try and add the same description name more than once, you will only see one in the Script Command list for that particular description.

Click Connect to retrieve the selected graphic weather maps. See Connecting to Jeppesen Weather for additional information about connecting.
If you want to create another request with different weather graphics without overwriting any existing saved scripts:
Open the Weather Graphics Selection dialog box.
Click New to create another graphic weather request.
In the Description field, name the new request.
Select the weather map types to download with this request.
Click Save, and then click OK to close the Weather Graphics Selection dialog box.
| NOTE | If you create a new request and do not save it, when you click OK to close the Weather Graphics Selection dialog box, you will be asked if you want to save the request. |
To modify the name of a request or the weather maps downloaded in a given request:
Open the Weather Graphics Selection dialog box using one of the following methods:
In the Weather Types section, double click Jeppesen Weather Images.
In the Script Commands section, double click an existing request.
In the Description field, use the drop-down menu to select the request to modify.
To change the name of the request, highlight and then edit the name.
To modify the weather maps to be downloaded, select or clear the weather map types check boxes.
FliteStar opens the last region edited for that weather description automatically with the products expanded to show you which weather maps you selected.
All regions that have a dark, thick border around the edges have weather products selected.
Click Clear All to remove all currently selected check boxes for the selected request.
Do one of the following:
To save your changes, click Save, and then click OK to close the Weather Graphics Selection dialog box.
If you do not want to save your changes, click Cancel.
To use a previously created graphic weather request to retrieve weather, select it from the Description drop-down list at the top of the Weather Graphics Selection dialog box and click OK.

To delete a graphic weather request, select it in the Description drop-down list and click Delete.
Graphics appear in the Weather Thumbnails pane as thumbnails below the list of text weather types. Click on a thumbnail to display the full image in the main viewing area of the Weather tab.
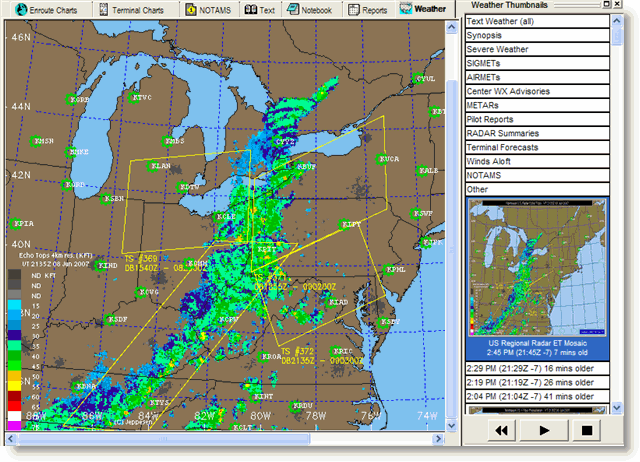
If you have downloaded more than one weather image in the same category,
they stack upon each other in the thumbnail with the newest graphic being
displayed to the oldest graphic downloaded. The time stamp is based upon
the inventory files packaged on the server, and the time zone is based
upon your computer's clock to ensure your geographic location is correct
in relation to the age of the image. Animate multiple images of the same
category 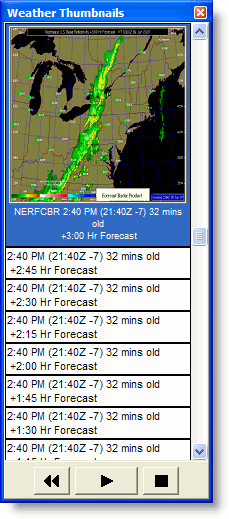 to see weather trends.
Use the animation portion of the Weather Thumbnails dialog box (Weather> Weather Thumbnails) to see weather trends in the Weather tab. When more than one version of an image is downloaded, the chart animation buttons below the thumbnails become active. Animation works with only two images, but more images provide better trend information.
· Click
the Forward arrow ![]() to start animation.
to start animation.
· Click
the Stop button ![]() to stop animation.
to stop animation.
· Click
the Back arrow ![]() to show the animation
in reverse.
to show the animation
in reverse.
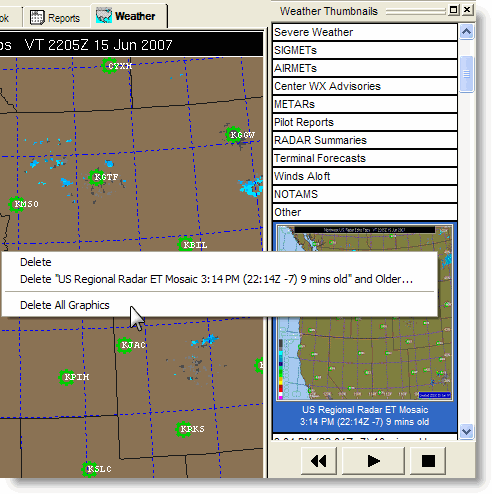
Deleting a weather image in the Thumbnails pane removes the file from your computer. To delete weather images, use the Weather Thumbnails pane:
To delete a single weather image, right-click the image and choose Delete.
To delete a series of the same weather map type, right-click the image and choose Delete [image label] and Older.
To delete all the images, right-click any weather image and choose Delete All Graphics.
See also: