| NOTE | Place your cursor on different areas on the image
below until you see the white hand, |
The Trip Kit is a collection of charts and information that can be printed together for a particular route or a set of routes in a RoutePack.
| TIP | To expand large European VFR Area charts over many pages other than being scaled to a single page, click Tools > Options and select the Allow large charts to be divided into smaller sizes check box on the Printing tab. |
To print a Trip Kit:
Select the RoutePack or route in the RoutePack List.
Open the Printing [RoutePack/Route] dialog box by doing any of the following:
Click the Trip Kit button on the Quick Bar.
Click Preflight > Reports > Trip Kit.
Right-click a RoutePack or route in the RoutePack List and choose Print.
Select a RoutePack or route in the RoutePack List and click File > Print [RoutePack].
Select a RoutePack or route in the RoutePack List and click File > Print > Print [RoutePack] in RoutePack List or Print [route] in RoutePack List.
Select a RoutePack or route in the RoutePack List, click the Print toolbar button drop-down menu and choose File > Print > Print [RoutePack] in RoutePack List or Print [route] in RoutePack List.
| NOTE | Place your cursor on different areas on the image
below until you see the white hand, |
| NOTE | The areas outlined in red are available only when JeppView is installed. |
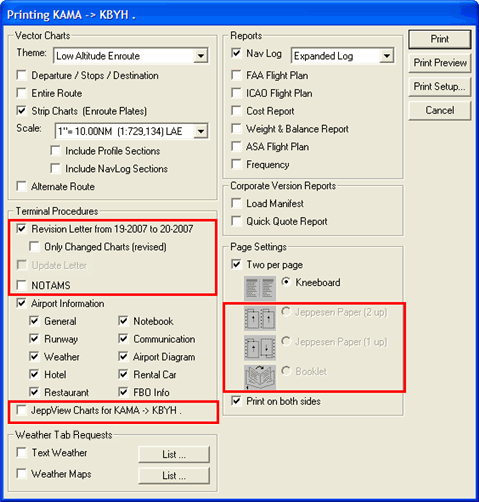
Select print job preferences in the Vector Charts section.
Theme refers to the type of chart (High Altitude Enroute, Low Altitude Enroute, and so on). The default choice is the theme currently displayed in the Enroute Charts View. The printed charts might not reflect all of the chart elements displayed in the Enroute Charts View due to decluttering considerations, but the program does take into account the chart preferences.
Departure and Destination prints the departure and destination at a 1:250,000 scale. If selected, these charts print first in the Trip Kit.
Entire Route prints an overview enroute chart page displaying the route. When Strip Charts is also selected, the overview page contains numbered boxes representing each of the strip chart pages to be printed. If a RoutePack with more than one route is being printed, the system prints an overview chart page for each route.
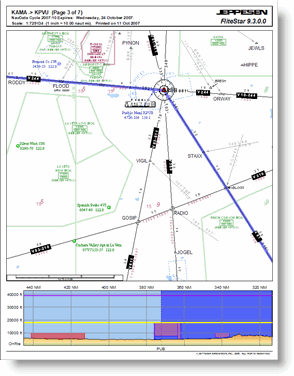
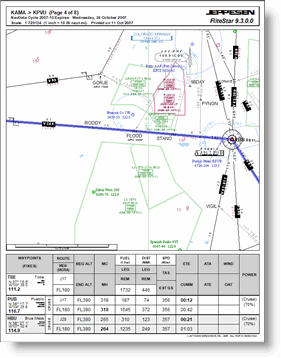
Strip Charts prints your entire route in sequential pages with several scales ranging from 1:2,084 to 1:134,775,469. Specify any theme scale with any theme. Beside some of the theme scales is the name of the printed chart of that scale:
LAE — IFR Low Altitude Enroute Charts
(**) — The scale of the current Enroute Charts view.
Include Profile Sections becomes available when the Strip Charts check box is selected. Select the Include Profile Sections check box to print the section of the profile view associated with the enroute section being printed.
Include NavLog Sections becomes available when the Strip Charts check box is selected. Select the Include Profile Sections check box to print the section of the navigation log associated with the enroute section being printed.
Alternate Routes prints all alternate routes in the RoutePack or the route. This option becomes available when an alternate route is part of the flight plan.
The amount of paper required to print the charts depends on the scale you choose, the length of your route and your page setting selection.
| NOTE | Depending on the scale that you select, enroute chart objects might print differently than what appears on the screen. Use Print Preview to view the appearance of the printed chart. To reset enroute chart preferences, adjust the zoom level and change your chart preferences. |
Select the information that you want to print in the Terminal Procedures section of the Printing dialog box.
Revision Letter includes a list of all terminal charts in the RoutePack that have changed since the last revision cycle. The Only Changed Charts (revised) option prints only the terminal charts listed in the Revision Letter. This option is only available when JeppView is installed.
Only Changed Charts (revised) is available only if the Revision Letter check box is selected.
Only Changed Charts (revised) is unavailable if the Only Changed Charts (updated) check box is selected under Update Letter.
This option is not available if JeppView Charts for [RoutePack/Route] is selected.
Update Letter is available only when printing a RoutePack and includes a list of all terminal charts that have changed since the last time the RoutePack was printed and saved. This option is not available if the RoutePack has never been printed. The Only Changed Charts (updated) option prints the terminal charts listed in the Update Letter. After these charts are printed, they no longer appear on the update letter. This option is only available when JeppView is installed.
Only Changed Charts (updated) is available only when the Update Letter check box is selected.
When this option is selected, the Only Changed Charts (revised) check box under the Revision Letter check box becomes unavailable.
This option is not available if the JeppView Charts for [RoutePack] check box is selected.
| NOTE | Save the RoutePack after printing to add a time-stamp. The next time you print an Update Letter, JeppView checks this time-stamp to determine if there has been a chart update since the last printing. See Saving a RoutePack for additional information. |
NOTAMS prints NOTAMs associated with the selected RoutePack or route. This option is only available when JeppView is installed.
Airport Information prints airport information (General, Runway, Communication, Notebook, Communications, and so on) for airports in the selected RoutePack or route.
JeppView Charts for [RoutePack] prints all the terminal charts for airports in the selected RoutePack or route. This option is only available when JeppView is installed.
Print briefing text and weather maps that you downloaded through the Weather tab here. Select the check boxes in the Weather section, then click List to display a dialog box to select the weather information to print.
| NOTE | To print overlaid live Jeppesen weather as it is displayed on the Enroute Charts, display the weather in the Enroute Charts view, then print the Enroute Chart. |
Select the check boxes in the Reports section to print any of the following reports:
Nav Log (choose either Expanded Log, JAR-OPS Log or Standard Log).
| NOTE | Some
printer drivers have a difficult time printing the Nav Log and
the ICAO Flight Plan together using the Two
per page print setting. When this occurs, your printer
might freeze up, requiring you to manually turn the printer off
and then back on to clear the cached data. If this happens, try
the following:
|
If you have a corporate version of FliteStar, select the Load Manifest and Quick Quote Report check box in the Corporate Version Report section to print either report.
Select the Page Settings options:
If you make no selection, FliteStar prints charts scaled to fill an entire page. To print in single-page mode, clear the Two per page check box.
Two per page prints two charts on each page, maximizing each chart on its half of the page, in one of four ways:
Kneeboard prints with standard margins, designed for use with chart clipboards.
Jeppesen Paper (2 up) formats to Jeppesen 8.5-by-11-inch paper with 7-hole punches down the center and edge (Jeppesen part # AJV33003) for placement in Jeppesen binders. This prints JeppView charts, so that two charts are printed on the same page maximizing each chart on its half of the page. Margins include room on the left of each chart (center and left edge of the page) for 7-hole punch and placement in Jeppesen binders. To place the charts in order when they come off the printer, lay the sheets in front of you, and cut the paper between the charts. Pick up the first left chart, and place the corresponding right chart behind it. Go from left to right until the end of your route. This option is only available when JeppView is installed.
Jeppesen Paper (1 up) prints to Jeppesen 8.5-by-11-inch paper with 7-hole punches down the left and right edges showing one chart upside down (Jeppesen part # AJV33002) for placement in Jeppesen binders. This prints JeppView charts so that two charts are printed on the same page with one chart printed up and the other down maximizing each chart on its half of the page. Margins include room on the left of each chart (right and left edge of the page) for 7-hole punch and placement in Jeppesen binders. To place the charts in order when they come off the printer, lay the sheets in front of you, and cut the paper between the charts. Turn the right side stack of charts 180°, so that the charts are both in the same direction. Pick up the first left chart, and place the corresponding right chart behind it. Go from left to right until the end of your route. In the print preview orientation with duplex printing, charts display two-up, but print correctly. This option is only available when JeppView is installed.
| NOTE | The Jeppesen paper options are available for terminal charts and revision letters only. If you select any of the other printing options, the Jeppesen paper selections become unavailable. |
Booklet prints terminal charts in a sequence that allows you to fold all the printed sheets in the middle and place the charts in an 8.5-by-5 inch booklet format. In order for the Booklet option to be available, you must have only the following options selected: JeppView Charts for 'RoutePack'/Route', Two per page, and Print on both sides. This option is only available when JeppView is installed.
Print on both sides is available only if your printer supports duplex printing. JeppView automatically detects duplex printing capability and sets your printer accordingly.
Click Print or Print Preview.
TIP |
Select Print Preview to see how the different print options work without wasting paper. |
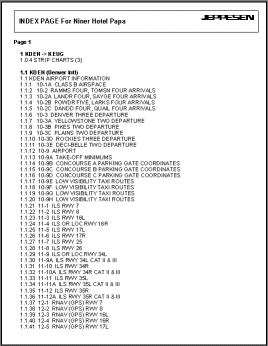
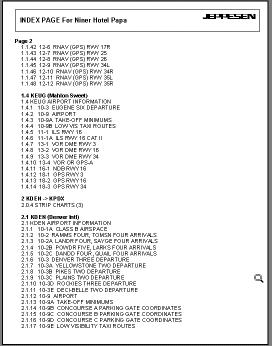
A Trip Kit printout of an entire RoutePack can fill many pages. FliteStar offers an index of all pages contained in the Trip Kit. To enable the index:
Click Tools > Options.
Click the Print tab.
Select the Show Index Page in RoutePack Printouts check box.
Click OK.
 =
=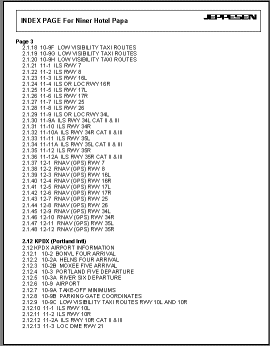
Trip Kit Index Pages
See Also: