FliteStar contains all the information you need to plan a flight. This is too much information to put on the chart all at once, so it’s important for you to know how to access and display the information relevant to your immediate planning needs.
Use the buttons on the different toolbars to change themes, show or hide map elements, and rearrange the chart views.
FliteStar offers several preset Themes that emulate the look of familiar aviation and standard charts. The default theme displays when you first open FliteStar.
To change the theme, use one of the following methods:
Click the Theme drop-down menu in the Chart toolbar, and then select the theme you want.
Click Chart > Vector Chart Themes, and then select the theme you want.
Right-click an open area of the Enroute Charts view, choose Vector Chart Themes on the shortcut menu, and then select the theme you want.
Within any theme, you can hide or display map features and data sets. The most commonly used data types are available by clicking on the Preferences toolbar. There are over one hundred types of map features accessible through the toolbar and the Properties dialog box.
To view the enroute chart properties, do either of the following:
Click Preflight > Properties.
Right-click an open area of the Enroute Charts view, and then choose Properties from the shortcut menu.
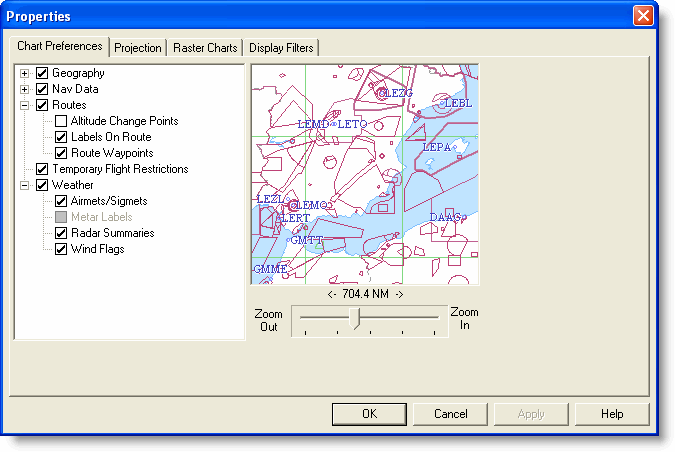
The Properties dialog box appears.

Chart features are organized by categories. Selecting an item's check box displays it in the Enroute Charts View, while clearing an item's check box hides it. If a category is cleared, none of the sub-items will display. Use the zoom slider to view the preferences across different zoom levels. You can also click the buttons on the Preferences toolbar to display or hide certain data.
To change your view, return to the chart Properties dialog box and select or clear check boxes according to the changes you want to make.
You can also reset the theme default features from the Enroute Charts View. To quickly reset the defaults, right-click in the Enroute Charts View and click Reset Theme Defaults.
This feature enables you to divide the screen vertically and set up two independent views. To zoom in on a particular navaid without losing sight of the entire route, or to view your proposed route on both vector and raster charts at the same time, click the Split Screen button or View > Split.
The Profile View visually presents terrain and winds aloft information along your route and gives you tools to quickly view and alter your planned flight altitudes accordingly.
The Thumbnail View shows you where you are in the “big picture” and allows you to adjust the size and placement of the area displayed in the Enroute Charts View.
For more information on viewing your Digital VFR charts, go to Displaying Raster Charts.