
The following procedure applies to CSC DUATS and DTC DUAT briefings. After you set up your weather account, use the Weather tab or click View > DUATS Controller to access the weather services.
The easiest method for downloading a weather briefing is to first create a route in FliteStar and request briefings and maps for that route. See RoutePack Wizard for more information on creating a route. You can also download a weather briefing by manually entering your route information in the DUATS dialog boxes.
Do one of the following to display the DUATS Controller:
Click the Weather tab. The view changes to the Weather window with the DUATS Controller at the bottom.
Click View > DUATS Controller. The DUATS Controller appears.
To move the DUATS Controller, click and hold an inactive part of the control panel with the mouse (try just above the Add button) and drag it anywhere in the screen to keep other information in view.
Select the appropriate weather service from the Weather Provider drop-down menu.

If you have successfully logged on to CSC DUATS or DTC DUAT using FliteStar’s first-time login feature, your access number and password are already filled in for you. Otherwise, enter your access number and password.

The DTC and CSC briefing lists are not entirely visible in the DUATS Controller, so you have to scroll down to see them all. See Weather Briefings for a complete list of DUATs briefings and their descriptions. The Standard Weather Route Briefing is the type you will normally use with FliteStar. It is the appropriate type of briefing after you have used FliteStar to plan a route, and you intend to make the flight within 6 hours. After you are comfortable getting route briefings, you may want to experiment with other items on the DUATS command list. You can add as many items as you want.

Double-click on the type of briefing(s) and map(s) you want or highlight them with the mouse and click Add.
Complete the information for the briefing type in the dialog box that appears. Make sure your tail number and aircraft codes are valid. A valid tail number must be entered before the program will continue.
To remove an item from the Script Commands, select it and click Remove.
Click Connect (with an Internet connection) or Dial (with a modem) to download your briefing.
| NOTE | If there is an earlier briefing in the Weather text window, FliteStar asks if you want to "clear text from last briefing." If you do, the previous briefing is cleared from the window and stored. You can access these saved briefings by clicking> Preflight > Weather Access > Import Briefing. |
FliteStar automatically disconnects after the briefing is completed. If you need to disconnect before a briefing is downloaded completely, click Hangup.
To edit the parameters for a map or briefing before connecting, double-click the name where it is listed under Script Commands in the DUATS Controller. When you are ready to get the briefing, click Connect in the DUATS Controller.
After the briefing, FliteStar displays a message, Session Complete. You can scroll back up in the terminal window and review the briefing.
All the categories within the briefing are listed on the side bar to the right. You can view the entire text by clicking Text Weather (All), or view by a specific category. Weather graphics are shown beneath the text categories in thumbnail views.
If you have chosen a category within the briefing, FliteStar prints only that category. To print the entire briefing choose Text Weather (All). After selecting the text you want, use one of the following print options:
Click File > Print.
Press CTRL+P.
Click the Print button on the toolbar.
You can also edit the text window and print the edited text. Click anywhere within the text area and use standard cut, copy, and paste commands.
To view a briefing that was previously downloaded:
Click Weather > Import Briefing.
Select the briefing you want to view. FliteStar names and sorts the briefings according to the date and time you retrieved them. Rename them the same way you would a standard text file.
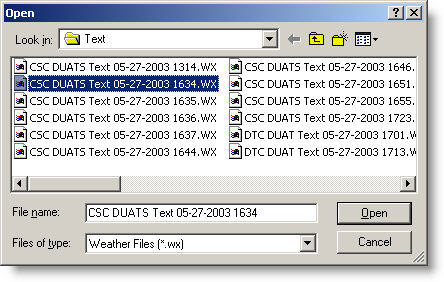
Open the plain text files in Wordpad or another word processor. The files are located in one of the following directories based upon your computer setup:
[root]:\Users\[User Profile]\Jeppesen\Common\Weather\Text (Windows Vista and Windows 7)
[root]:\Jeppesen\Common\Weather\Text (Windows XP)
[root]:\Program Files\Jeppesen\Common\Weather\Text (Windows XP)
When trying to open one of these files in another program, select All Files (*.*) in the Files of type drop-down menu, otherwise you may not see any *.WX files.
See Also: